

About 2 years ago I got this amplifier from a friend, and about a year ago I made a video fixing it up and getting it working again, it is a great sounding amp and I think it is about time that it got a proper case to protect it and to make it look as good as it sounds.
Check Out the repair article here!
The old enclosure that came with this amp was a huge combo enclosure. Now since this amp isn’t a name brand amp, and there was no speaker inside the amp when I got it, I don’t see any reason to keep it original, so rather than try and fix up the gross enclosure I opted to convert it from a combo amp into a stand alone head.
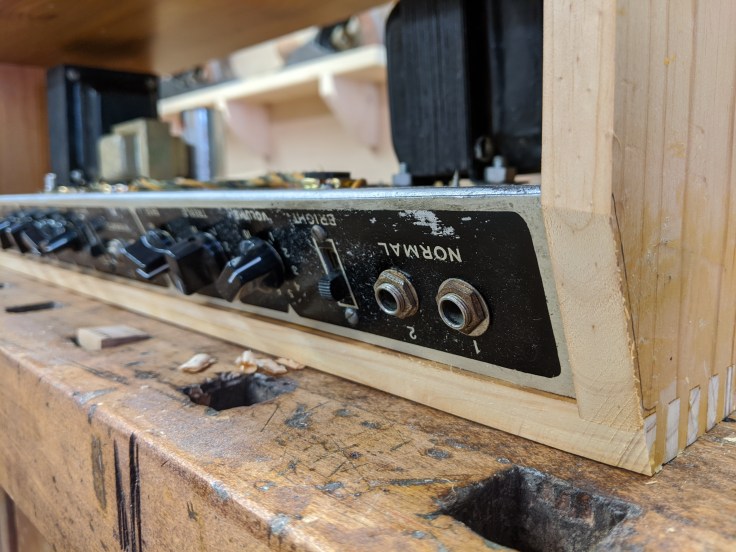
Now obviously my situation and this amp are pretty unique, but the chassis for this amp is almost identical to most Fender style amp chassis, so if you have a fender showman that you want to make a new enclosure for, or a twin reverb that you want to convert into a guitar head, then the measurements might be a little different, but the process will be exactly the same. The biggest difference is that this amp does not use the screws and metal straps on the top of the amp to attach the chassis, instead I have to hold the amp with supports inside the case, more on that later.
Help Support This Content!
For wood I am going to use some side panels from an IKEA dresser that I found out by the garbage in my neighborhood. Although it was garbage it is practically perfect for this. I started by breaking apart panels so that I could get to the panel on the inside. This ended up being a glued up pine panel a little over a 1/2 inch thick.

I cut down the pieces to 7 1/2″ wide and then cut them to their appropriate length. For the corner joints I made finger joints using Matthias Wandel’s screw advance box joint jig.

The fingers were a little tight when I glued everything together so I will have to adjust that for next time. Once the box was together it was time to cut the angled face in the amplifier to match with the face plate.

This turned out to be 70 degrees. I could set the table saw blade to 20 degrees, which really means 20 degrees off of 90, or 70 degrees. Then I could mark out were the face plate would go and cut the angled section in the top corner of the enclosure.
After that I could sand everything clean and flush and then add a small chamfer to the outside corners of the box.
Then I had to cut some support blocks for the chassis to rest on. The only real difference between an actual Fender amplifier and this one is that a Fender uses some metal straps on top of the amplifier to screw into the chassis and hold it in place. This amp only uses some screws at an angle in the back to keep the it in place, so the amp needs some thing to rest on inside the cabinet. This makes building the cabinet a little more tricky but I like the clean look of the amp when it is done and doesn’t have two metal straps on top.

You can see how the front support piece also has screws that go forward to attach the grill cloth, which is just a piece of 1/2 inch plywood with some fabric stretched over and stapled tight. I like to keep the staples on the back if I can instead of the sides, so that they don’t get in the way or scratch the cabinet when you slide the panel into place.


Lastly I could measure the middle of the amp to mark and drill some holes for the handle. It is kind of tricky to get the spacing right because the handle wants to be flat, but if you installed it like that there would be no room for your hand to fit under it, I just attached the handle to a random 2×4 to test the curve and feel of it and for this handle 7 inches apart felt good.
For finish I just rubbed on 2 coats of Natural Danish oil, mostly because it was easy and I had it. I think at some point I will go back and add some more layers of finish, I kind of want to try spraying on some shellac, but for now it is fine.
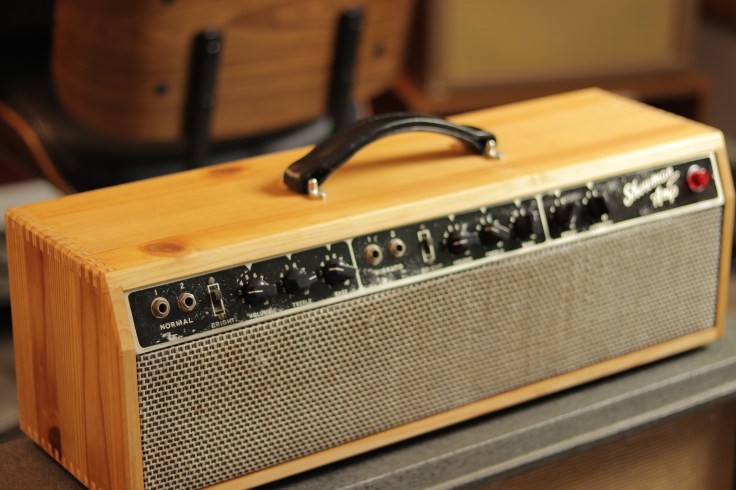
Overall this project came out great. If you want to see more of the process check out the build video below:
