
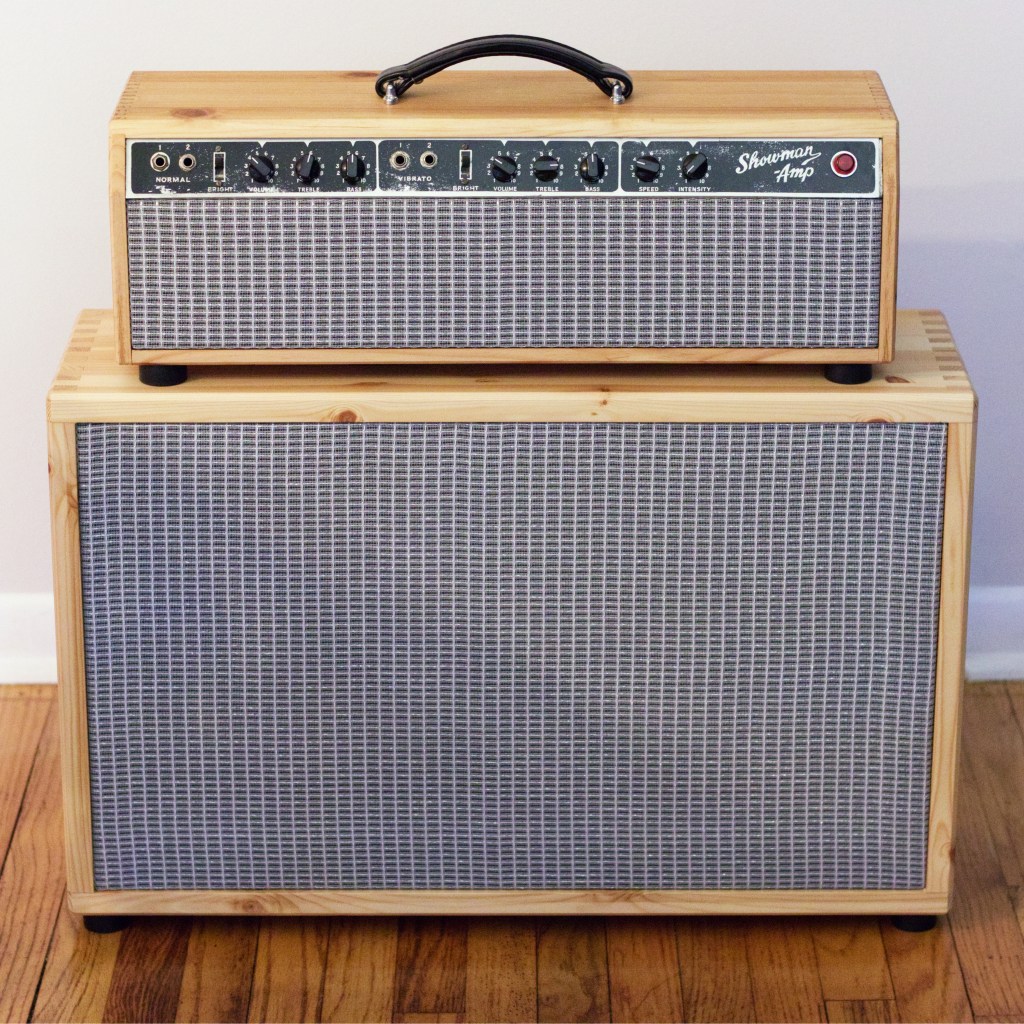
The custom head enclosure I made for my mystery tube amp turned out so good, I absolutely needed to build a matching speaker cabinet to go with it.
Check out the build article for the amplifier head here
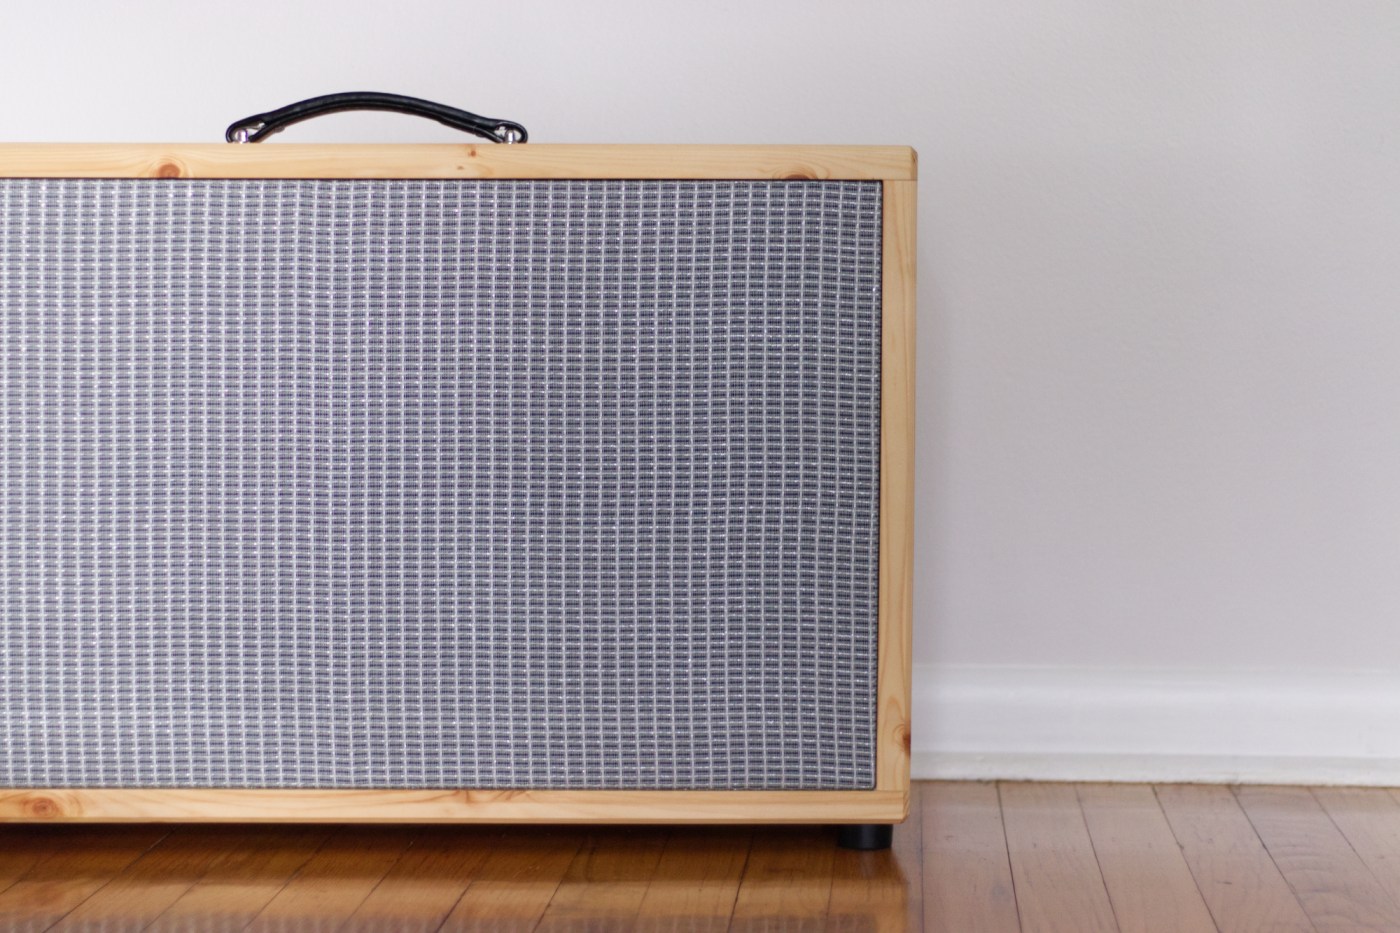
Since I knew that I wanted to build this speaker cabinet for a specific amplifier, the size of the cabinet was determined by what would look good sitting underneath the amp head. I needed a cabinet at least 24 inches across to be big enough for the amp to fit on top so I figured I would make it a little wider and allow it to be a 2 x 12″ speaker cabinet size. Although I only ended up putting one speaker in it for now, more on that later.
The amplifier head was made from an old IKEA dresser that I rescued from the garbage. I used the side panel pieces to build the amplifier head, so that I could save the big, 1 inch thick laminated pine top to build the speaker cabinet. The garbage wood and head mostly determined the dimensions of the cabinet. The total dimensions of the cabinet came to 29″ wide x 19″ tall x 9.5″ deep (~74cm x 48cm x 24cm).
Generally I try and use garbage and things that I already have on hand to build my projects. Truth be told I don’t buy everything on Amazon, and I don’t necessarily suggest that you do either. To go out and buy every little last thing for every project does get quite expensive, but since people always seem to ask, here are links to everything used:


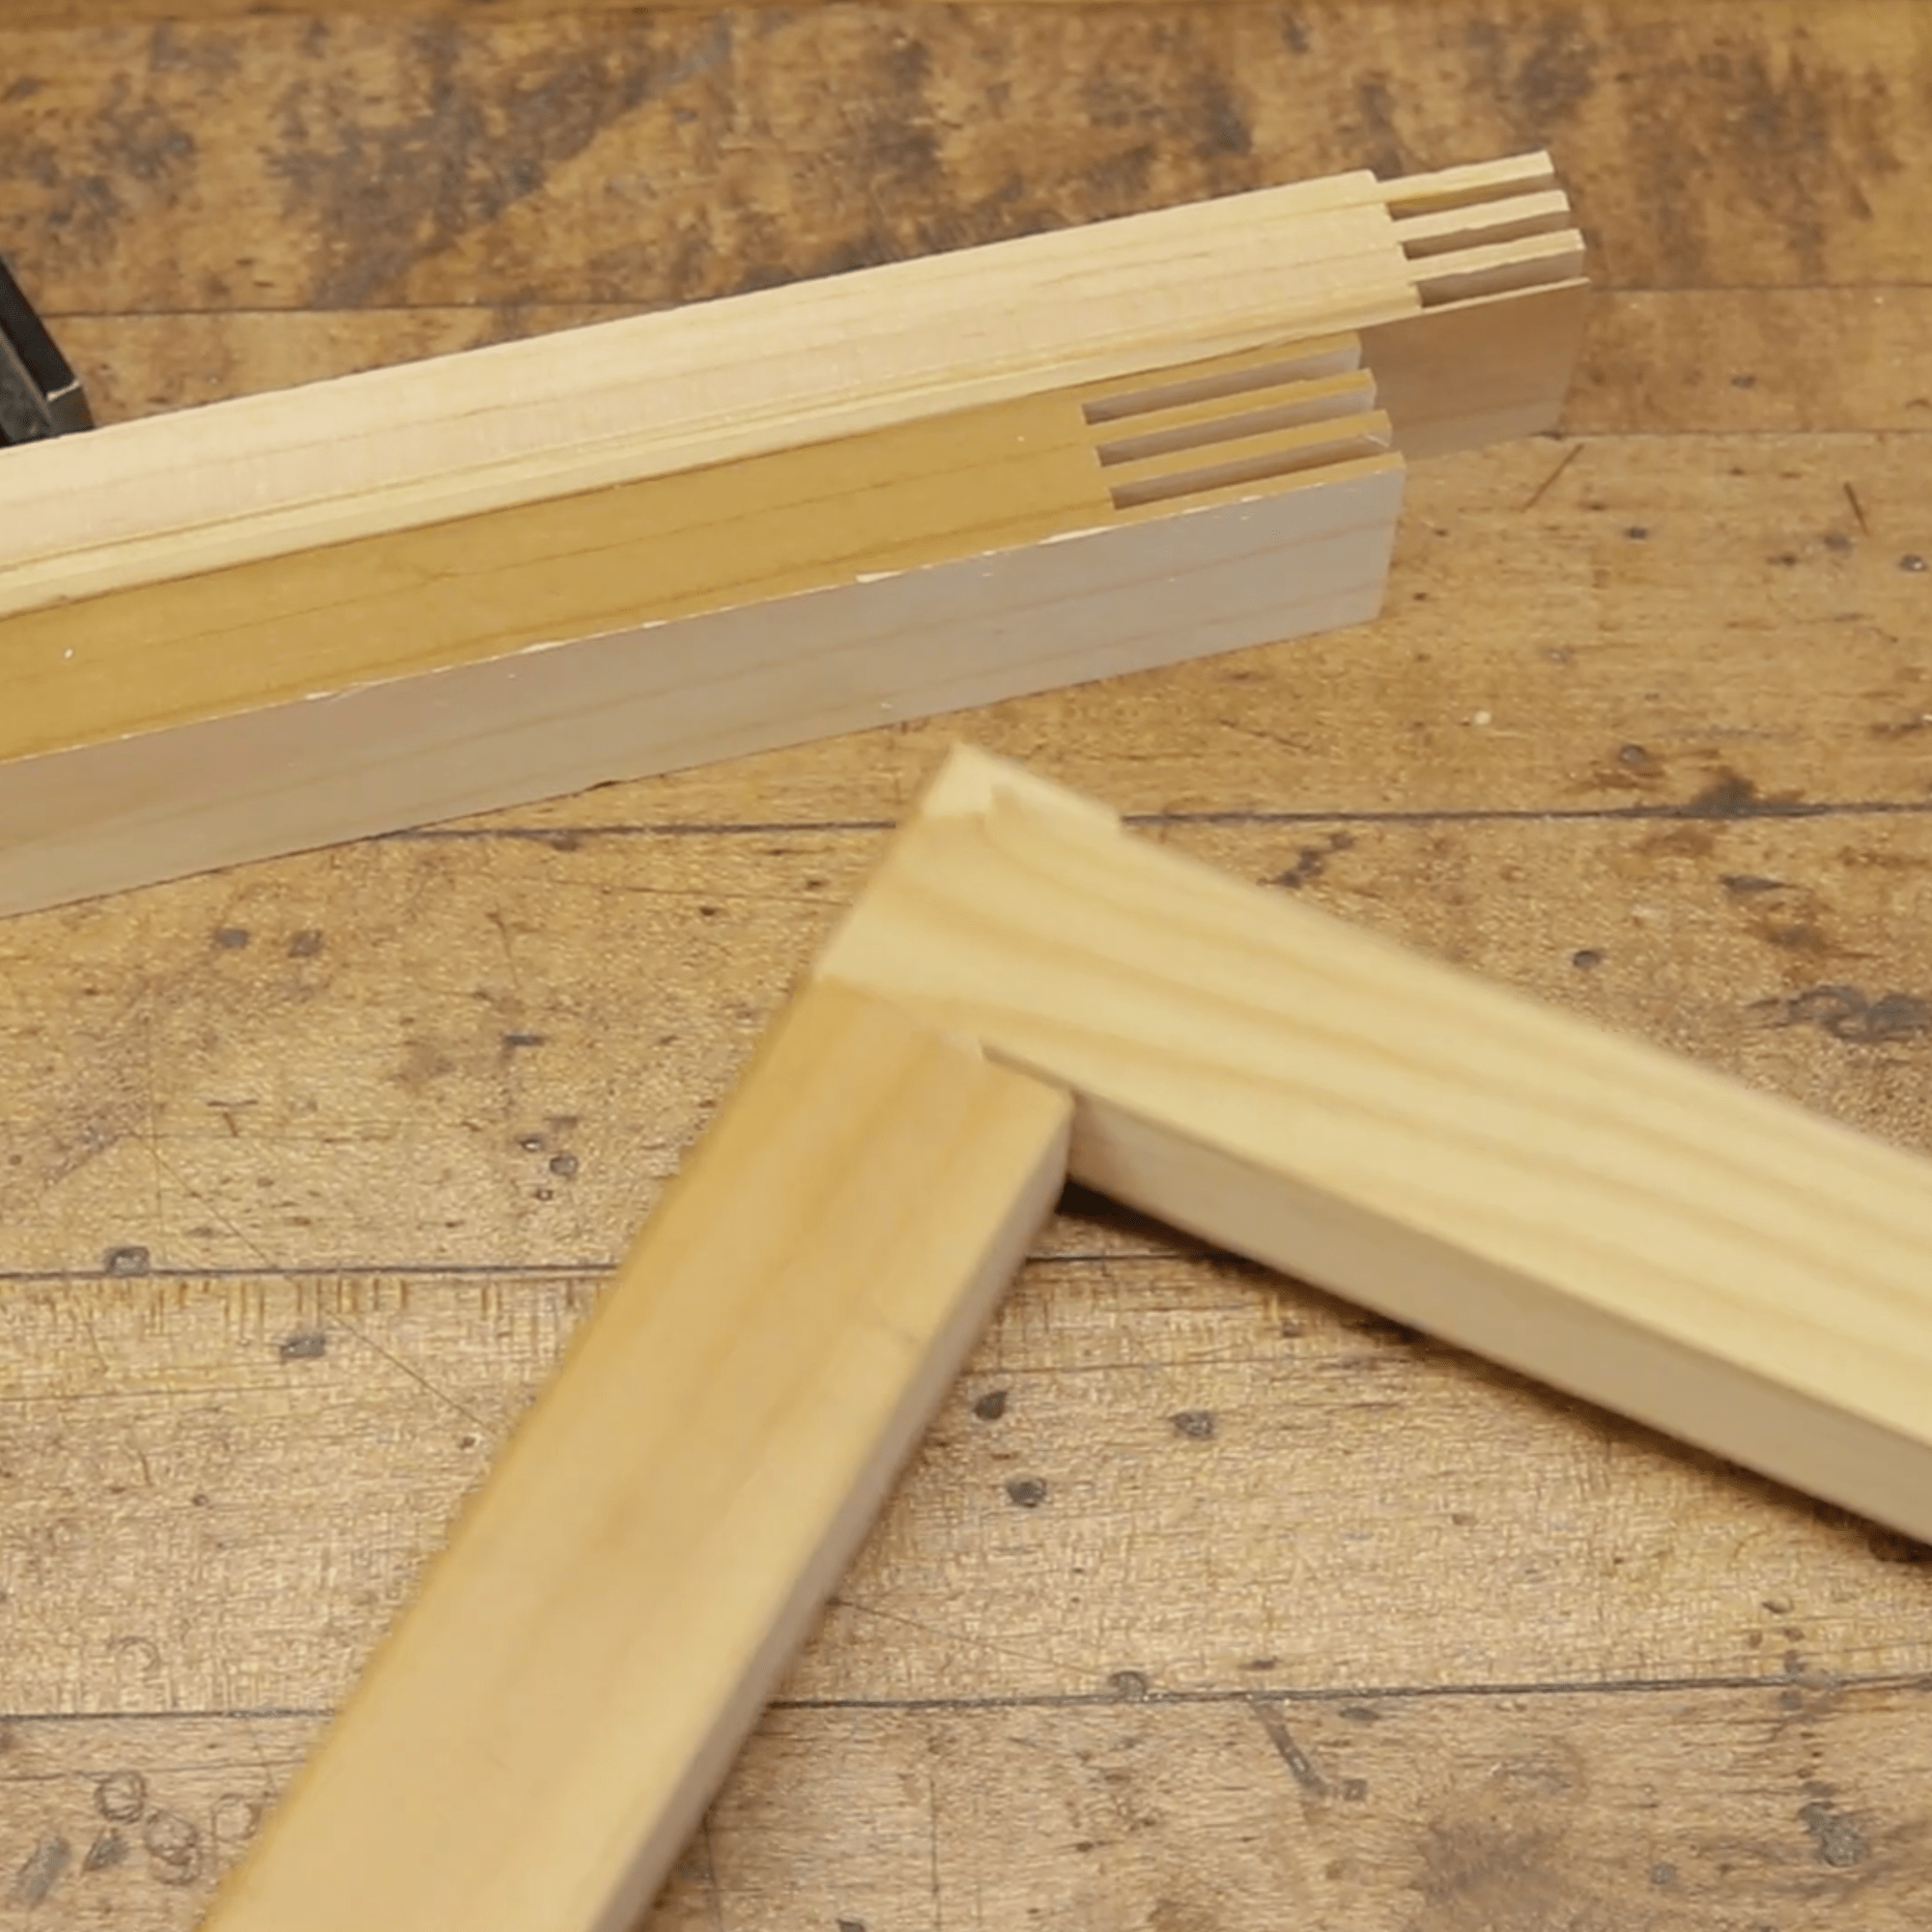
After ripping down the pieces and cutting them to length it was time to cut the joinery for the corners. I went with finger joints, or box joints. Why? Because they are the best option. They are as strong as possible and don’t look too bad either. There are a bunch of ways to cut box joints on the table saw but now that I have a Matthias Wandel screw advance box joint jig I won’t cut them any other way. It is fast, easy, and accurate.
You think that kind of automation is easy? Or Cheap?
Dennis Nedry
HELP SUPPORT THIS CONTENT
The glue up for box joints is always the most stressful part. Since my fingers were a little tight I figured regular wood glue would have caused my fingers to swell and I would have never been able to get the joints to fully close. So instead I used polyurethane construction adhesive. It has a longer working time which is nice, and instead of making the joints harder to get together it sort of lubricates everything nicely allowing everything to slide together nicely. The only down side is that it is a little bit more messy.
Once the main shell was done it was time to make the speaker baffle and grill cloth frame. A lot of times these pieces are one in the same but I opted to make the grill cloth separate so that I could more easily fix, change, redo any part of this amp in the future.
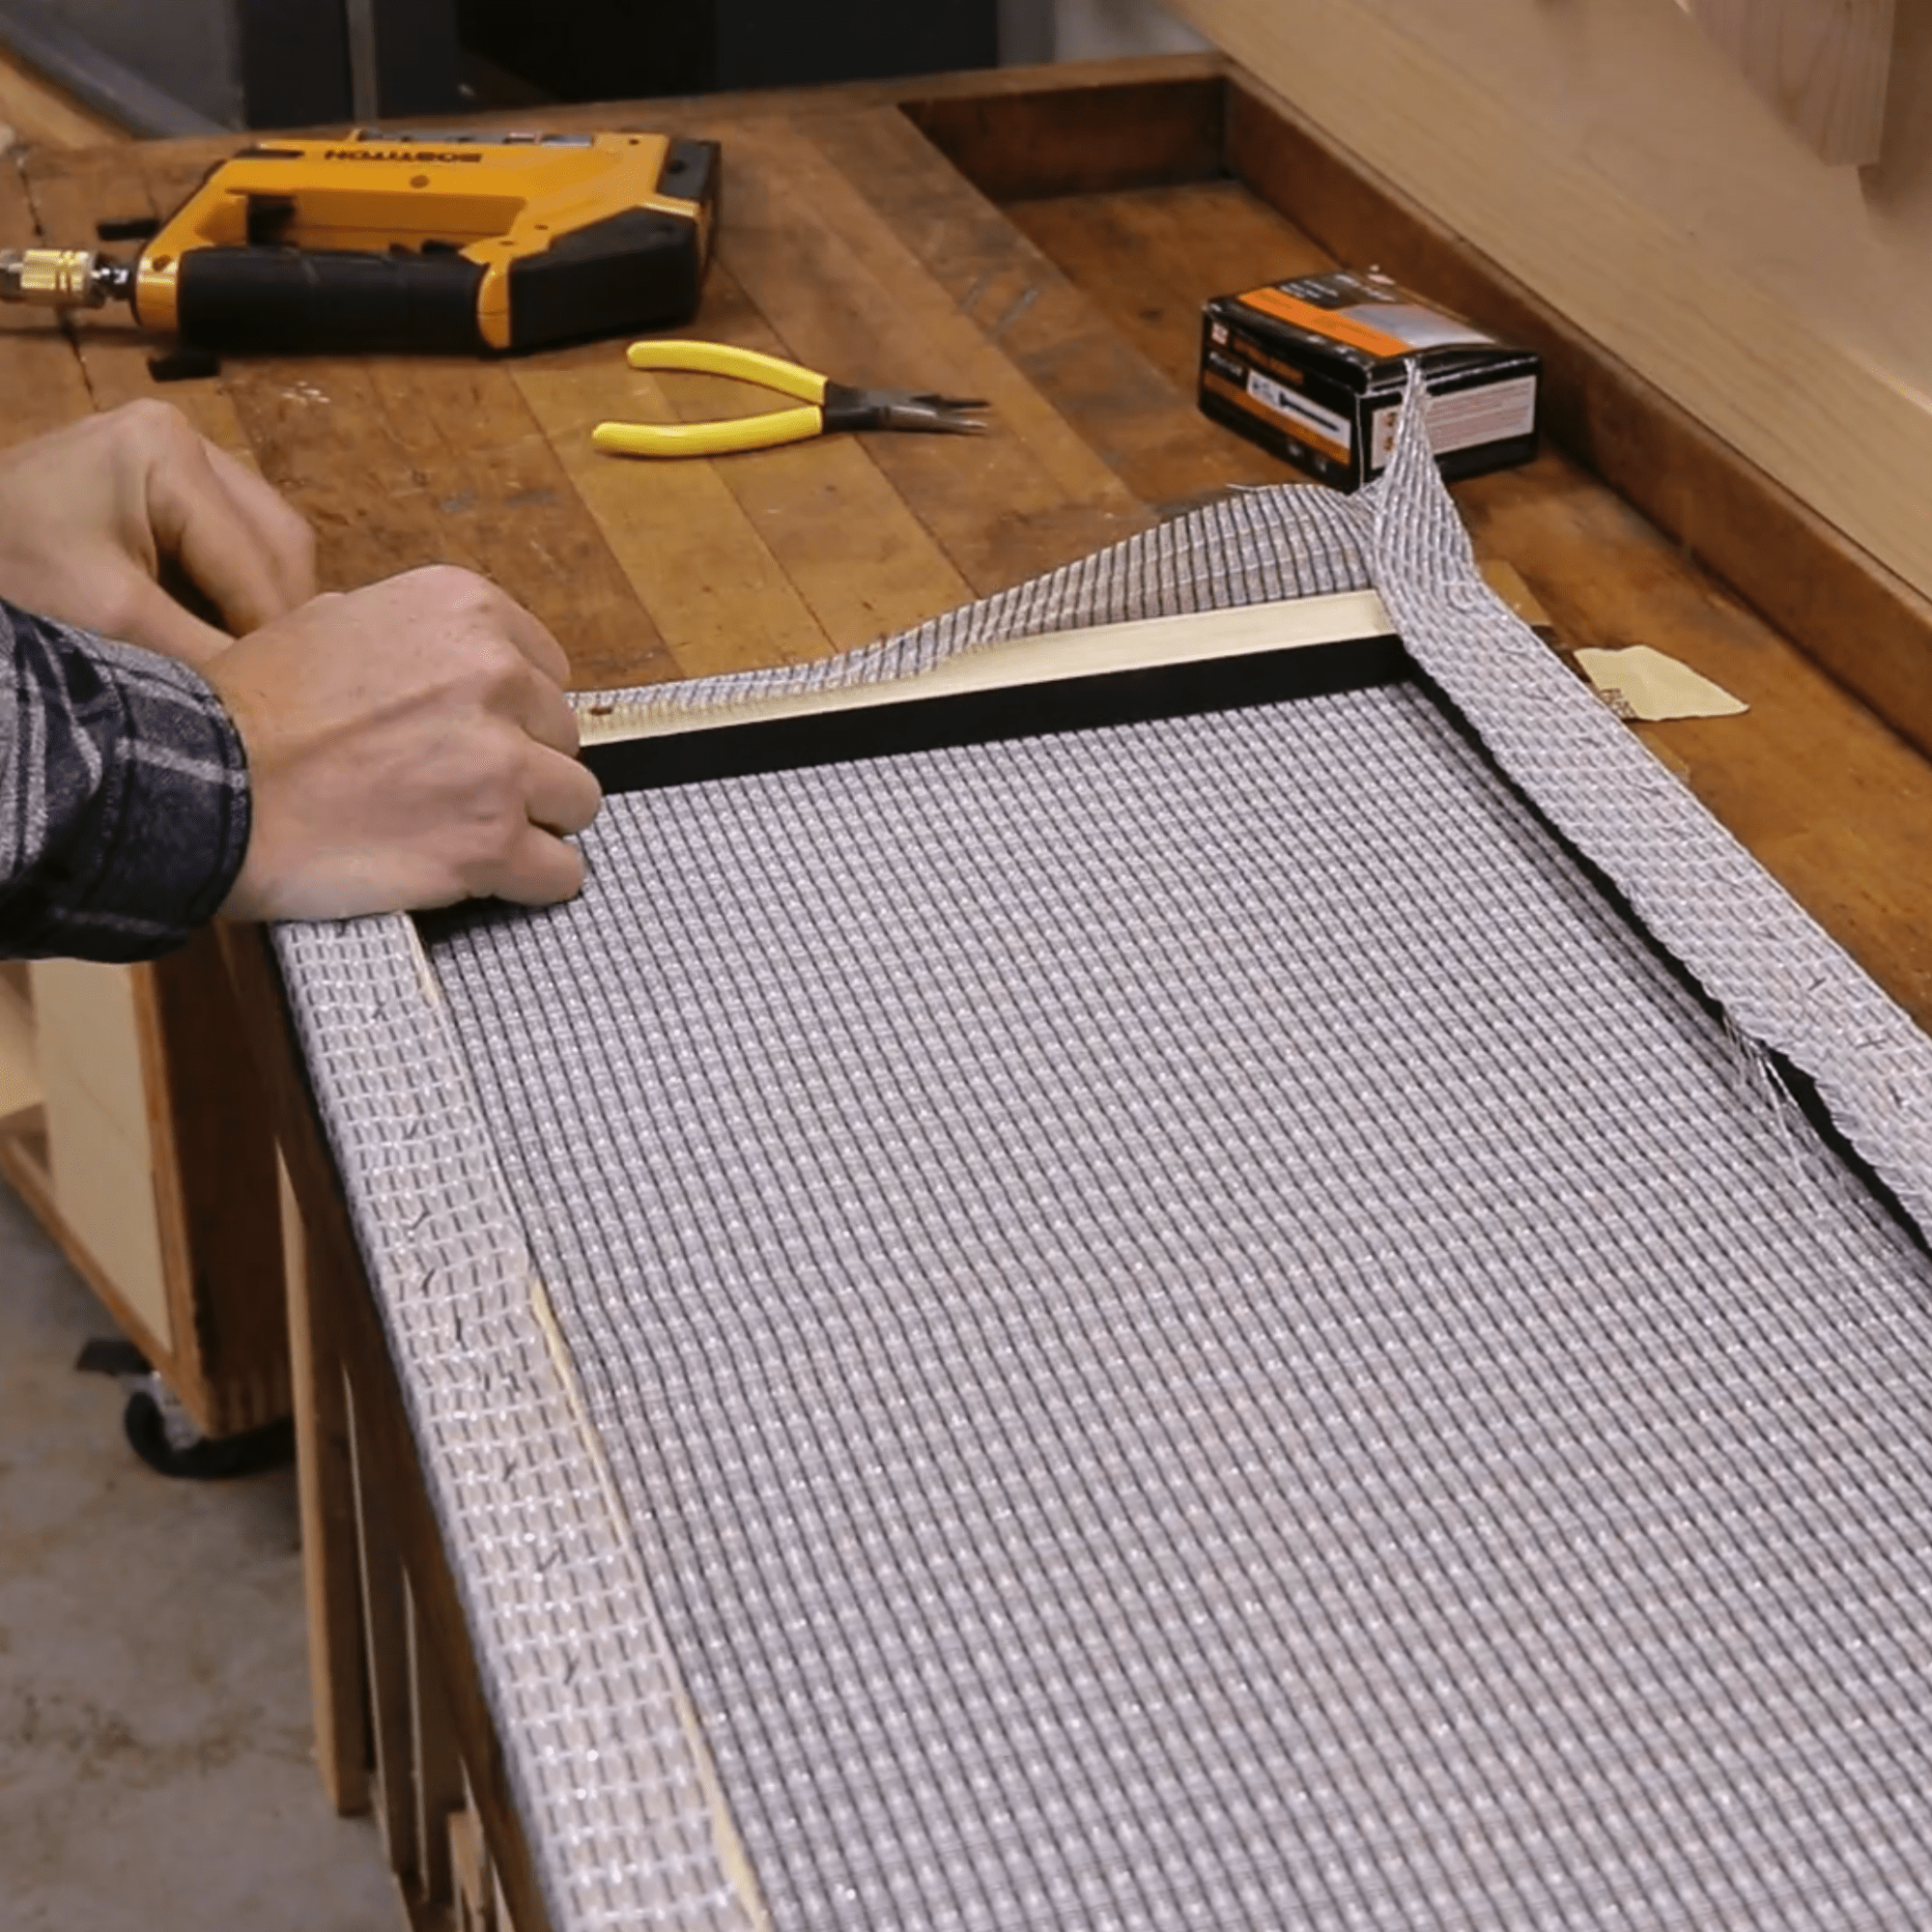
The frame for the grill cloth is just a 5/8″ by 1 inch piece of pine, also from the IKEA dresser that I cut box joints into the ends to glue up into a frame. Then it is covered in standard Fender black / silver grill cloth.
The speaker baffle is made from 1/2″ or really 12mm Baltic Birch Plywood. It seems like a lot of people on the internet recommend 3/4″ plywood for guitar speaker cabinet baffles but I think that this is over kill. Especially when the baffle is screwed down securely all the way around the full border of the baffle. Who knows though, maybe I am just biased since I had the 12mm plywood on hand.
As mentioned the speaker baffle and grill cloth frame get securely held down to the cabinet with some wooden cleats that were cut from more pieces of IKEA garbage wood. Everything is screwed down so it can be removed later if I need to change anything.
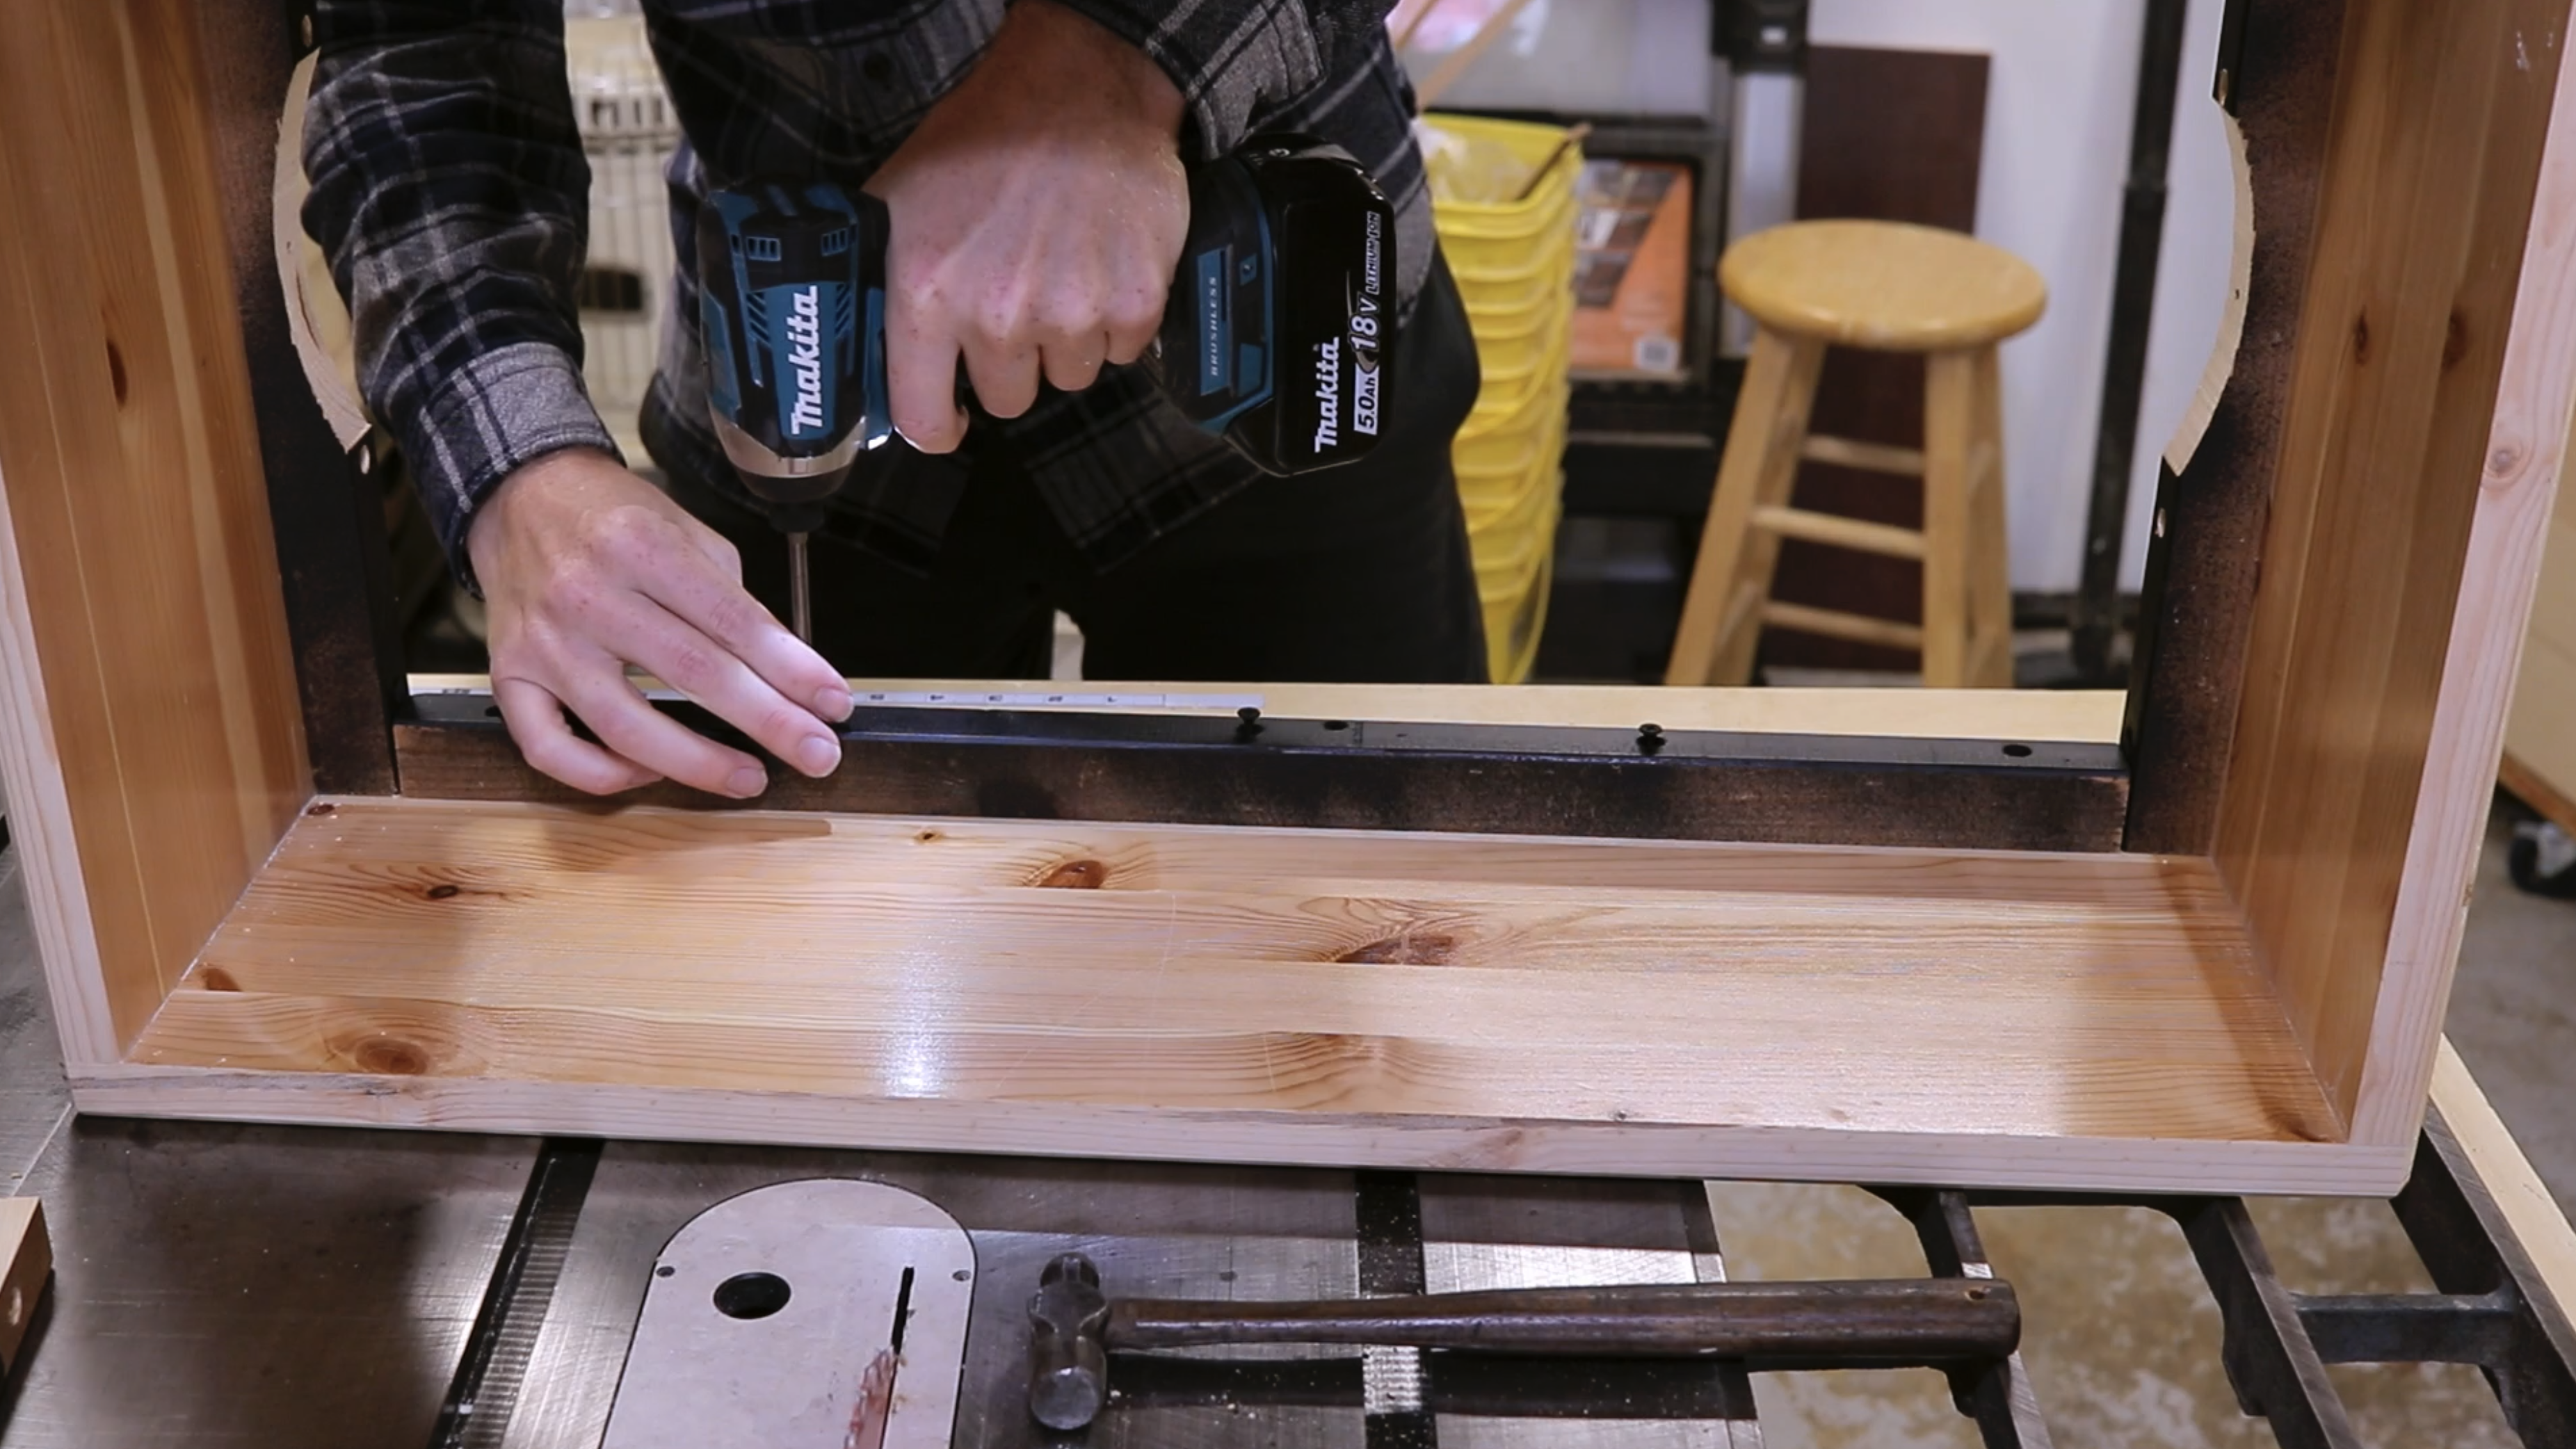
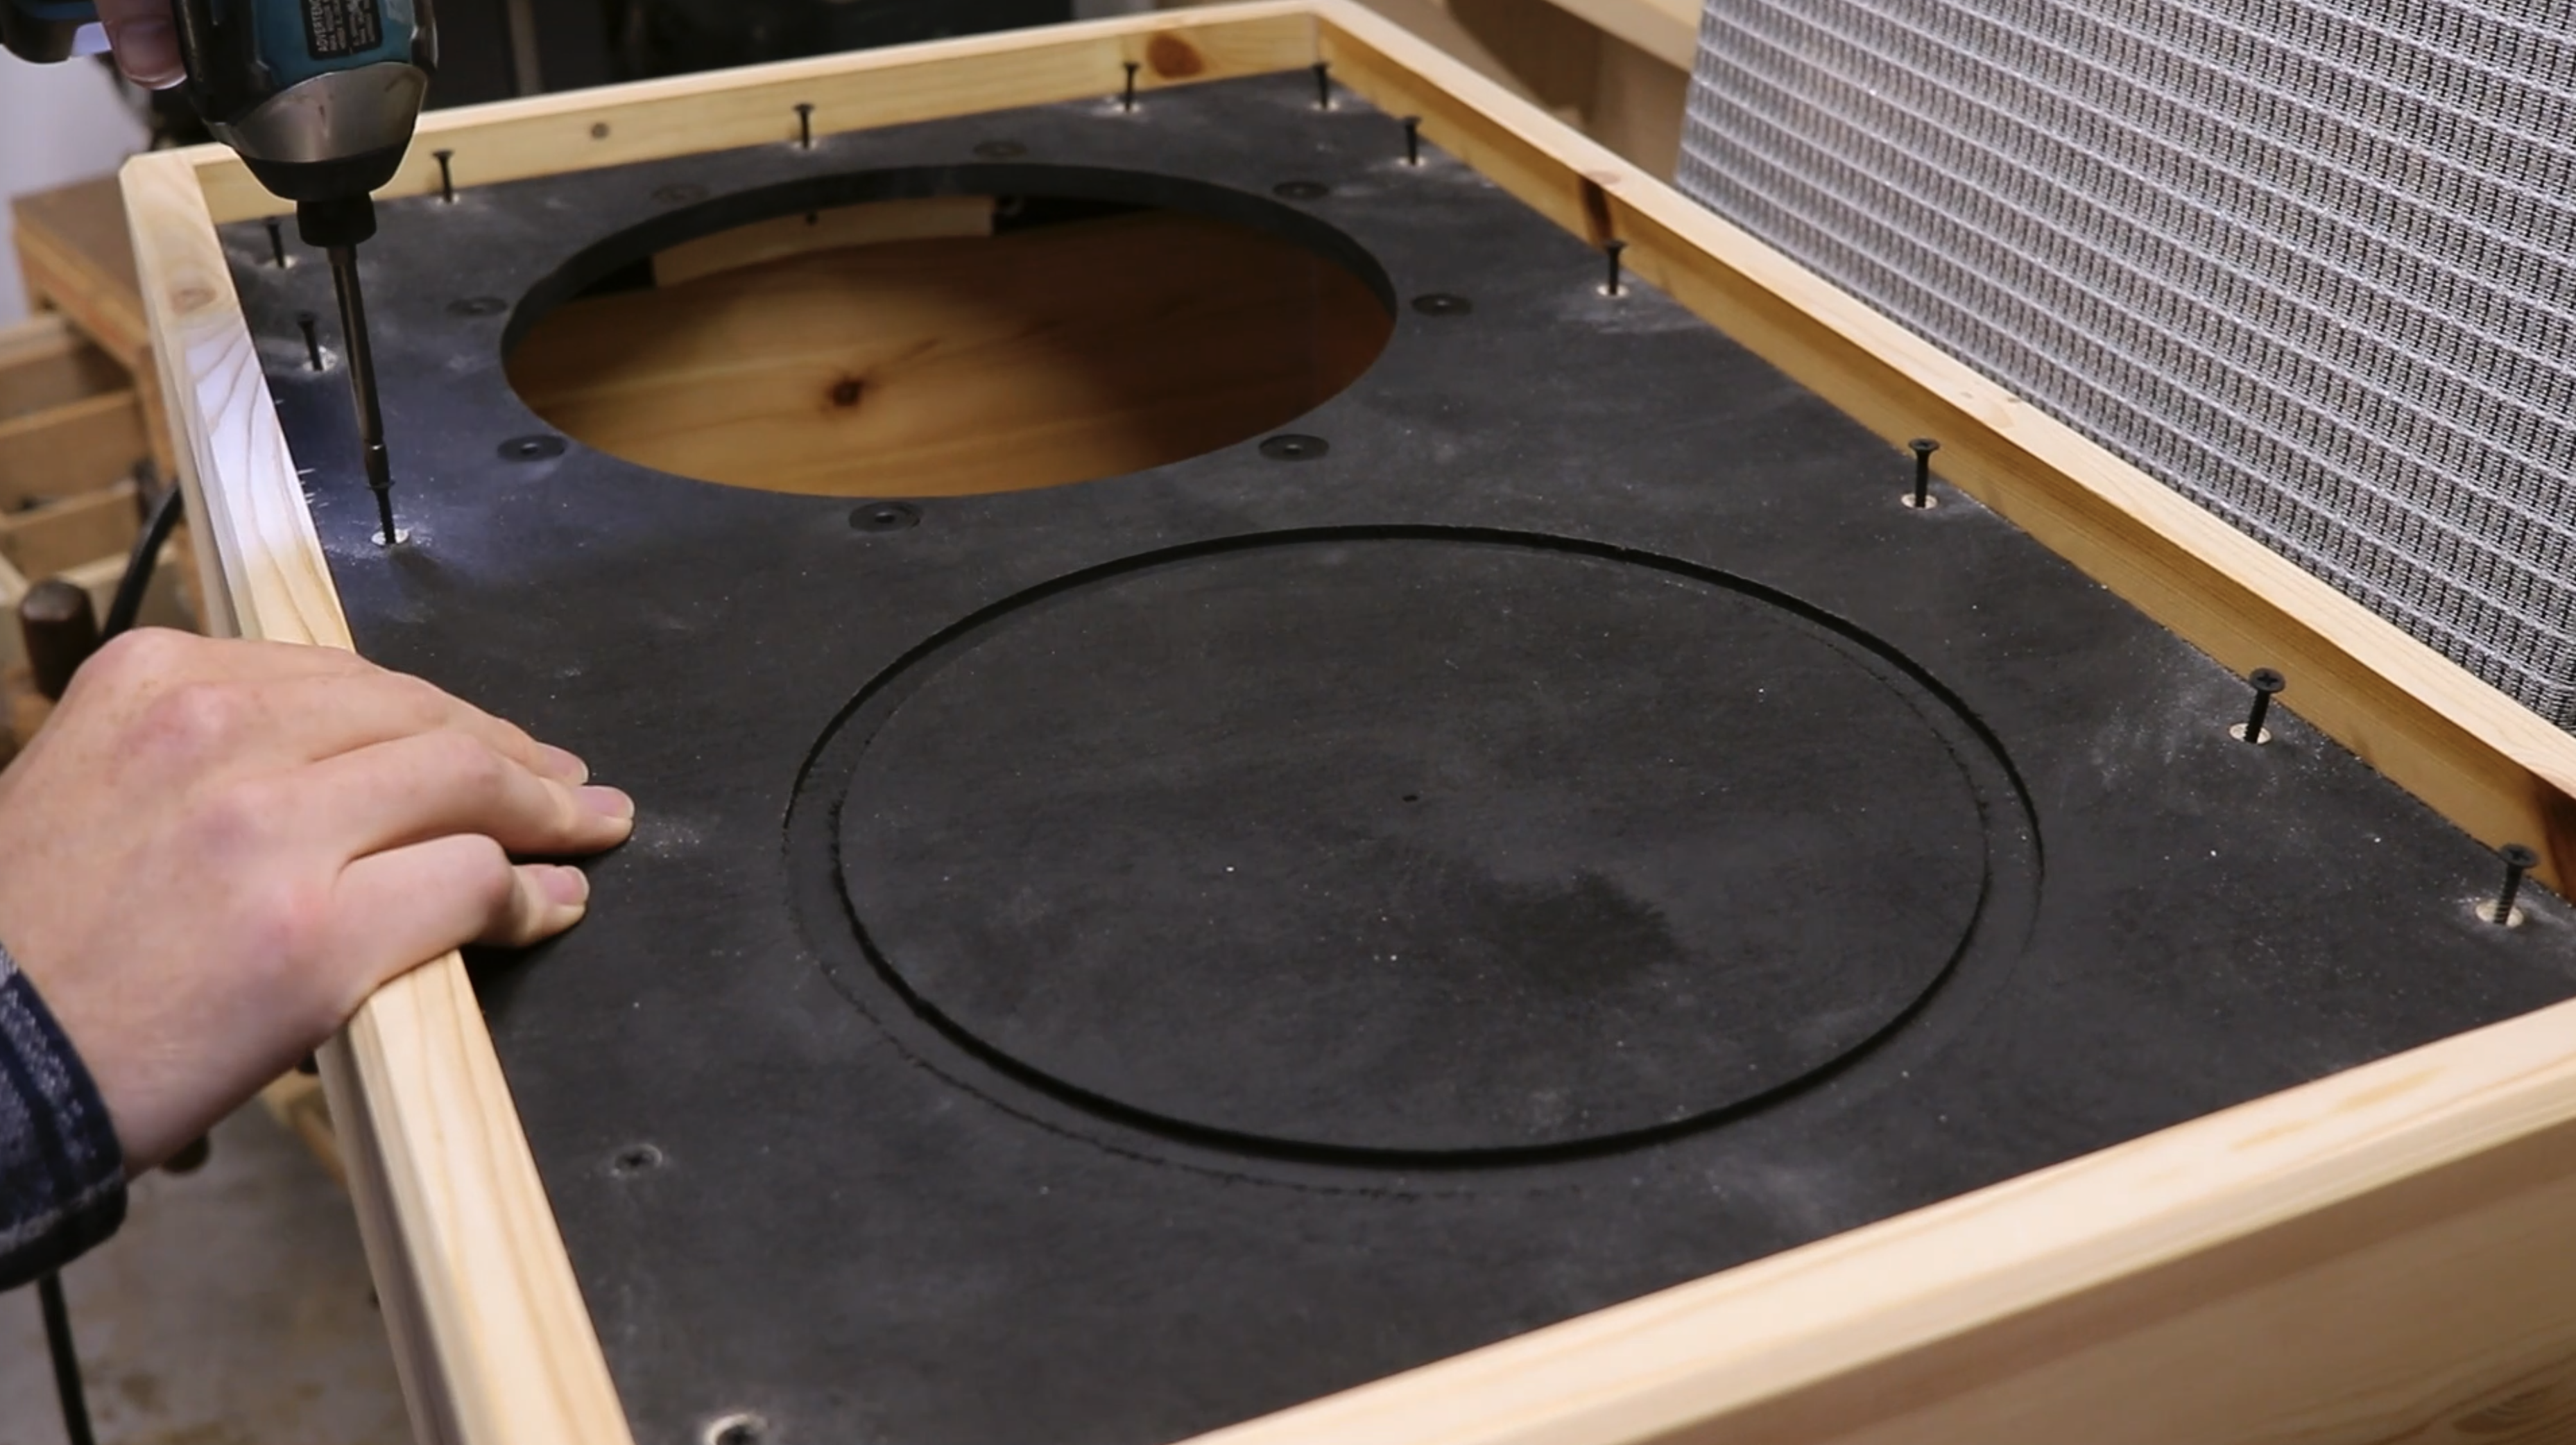
But wait…before I attached the speaker baffle I had to cut the holes for the speaker. Now maybe this step won’t be too popular but oh well, it’s my amp and I can do what I want. Earlier I said the speaker cabinet would be 2 x 12 sized, and it is. Two, 12 inch speakers could fit in this cabinet. I however am only going to install one for now. If I change my mind then I can just finish the second speaker hole and add a second speaker.
Now 12 inch speakers actually only need a hole with a 10.75 inch diameter. So I laid out the hole placement and then cut them out with a circle cutting jig in my router. If you don’t have a router, fine, just cut the holes with a jig saw, or coping saw, or whatever you have. My circle cutting jig isn’t too fancy though. Just a piece of 1/4 inch plywood that was wood paneling I took down from my family room. I used a nail pounded into the center of my circle to allow the router to spin around and cut part way through the plywood. Then I cut out the hole with a jigsaw and cleaned up the hole with a flush trim bit in the router.
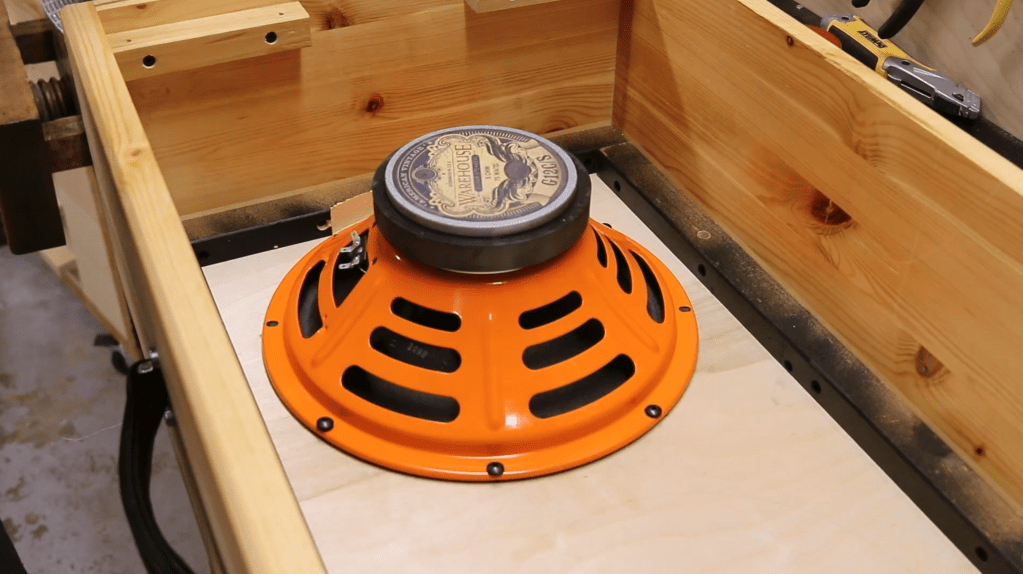
To mount the speakers I used 10-32 threaded inserts from parts-express. Why 10-32? Because I already had a bunch of pan head 10-32 screws with washers. Why did I already have a bunch of those screws? Because that is the standard 19 inch rack mount screw. Seems to be some debate on what is best for mounting speakers. 1/4 inch inserts, 10-32, Philips screws, Allen screws. Truth be told what you already have is probably fine and dandy.
I drilled some counter sunk holes with a forstner bit and then through holes and pounded in the inserts. I purposely mounted the speaker a little crooked so that the inserts wouldn’t end up exactly centered on the baffle where it is thinnest between the speakers. I don’t really know if that will make a difference but it certainly won’t hurt.

I went with a 1/3 open back design for the cabinet. I found a truly awful and ugly piece of pine that I had from somewhere for the back panels. After some hand planing and cutting it down on the table saw it really didn’t look too bad though. They also just get attached with screws to some cleats on the inside.

After copious amounts of sanding I wiped the amp down with some Mineral Spirits to remove the dust, and then I could apply two coats of natural danish oil.
Now I could just mark out and attach a Fender style leather handle to the top, using some machine screws and more 10-32 threaded inserts. As well as some Peavey rubber amp feet to the bottom.
Most speaker cabinets just have a metal plate with a 1/4 inch jack attached directly to the speaker terminals. But this is not most speaker cabinets. I wanted to add a passive attenuator to the cabinet so that I can dial back the volume to match whatever space I am playing in while maintaining my desired tone and grit. I have a separate video and article going all into how to make your own attenuator so if you want more information on that check out.
The heart of this attenuator is a giant volume knob called an L-Pad. for my purposes here the wiring for the attenuator is literally on a sticker on the side of the box. It couldn’t be any easier. The hard part really just comes from drilling a bunch of holes in to an enclosure.
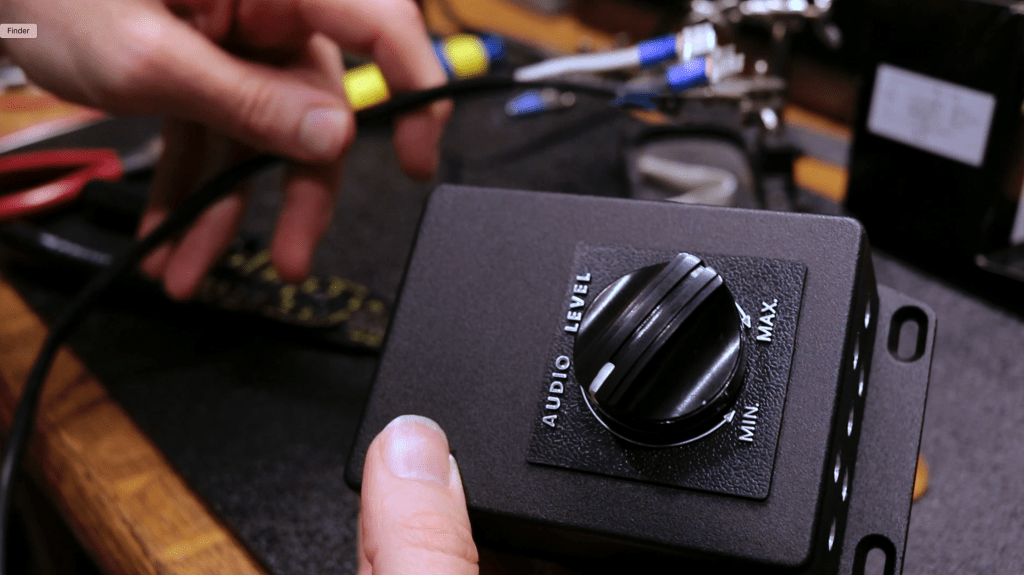
I used this pre-painted Hammond enclosure with mounting flanges. I drilled three holes for the L-pad, input jack, and wire coming out to go to the speaker. As well as a checker board pattern of holes in the top and bottom of the enclosure for heat to escape. Now that whole unit can be installed in the side of the cabinet, and I have a standard input jack, as well as a separate volume knob that allows me to play this amp without needing to later clean up broken glass or see an audiologist to get fitted for hearing aids.
If you are a visual learner then props to you for somehow reading this far into the article. Or if you would just like to hear what this amp sounds like your reward is a video of the build process:

Leave a comment