

Winding your own pickups is a great way to get more out of your electric guitar. However, buying all of the necessary equipment can become pretty expensive. However with a cheap sewing machine from a thrift store and some scrap wood we can build a pickup winding machine.
The first that we need to do is get a sewing machine. These can be found pretty easily at Goodwill, Salvation Army, or on Craigslist for pretty cheap. I picked up my sewing machine for $6.00 at Salvation Army. It doesn’t really need to have all the pieces since what we want is all on the inside, but it does need to turn on and spin up.
Then we can begin taking apart the machine to get at the parts that we need. This just requires some patience and a screw driver. Sometimes you will have to pry apart the plastic shell but since we don’t care if we break it you really can’t screw anything up.
Help Support This Content!
Once inside we want to save the motor, plug, power switch and light bulb assembly. The main driveshaft with the gear and belt to attach it to the motor. And any other little miscellaneous screws and parts. It is a good idea to just finish the pickup winder before you throw away the rest of the sewing machine to make sure you have everything that you need.
Then I made a 5 inch circle out of 1/2 inch Baltic Birch plywood (or 12mm for those of you not in the USA). I also cut some supports to hold the whole driveshaft up in the air and mount it on the bearing that it turned in when it was inside the sewing machine.
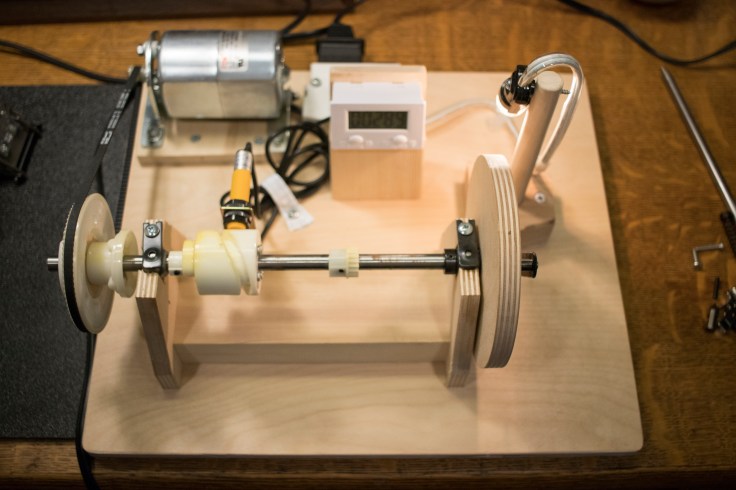
Here is a look at the machine once it is completed. Most everything could be cut with a bandsaw. However if you don’t have a bandsaw a jigsaw or even coping saw could get the job done.
Once the driveshaft is mounted on a piece of 1/2 inch plywood for the base then you can mount the motor so that the belt can attach the motor to the driveshaft. You have to adjust the placement of these two pieces so that the belt tracks straight and has an appropriate amount of tension.
Next I added a digital counter with magnetic switch sensor. like this one here. https://amzn.to/2QjlvPA
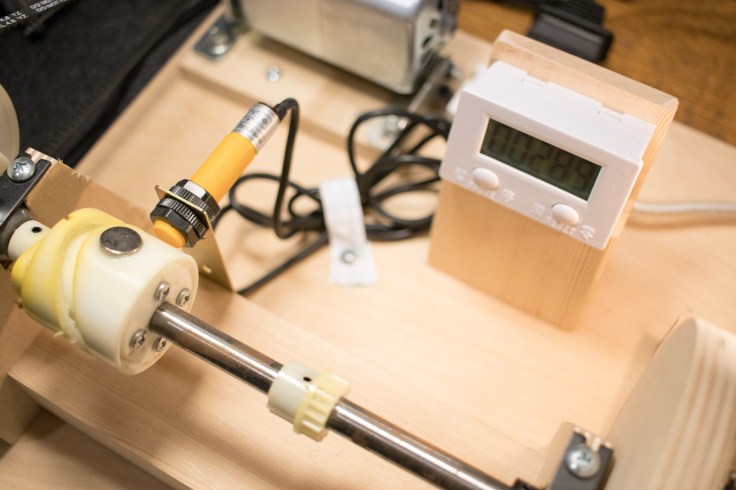
That way as the machine spins the counter keeps track of the number of turns. Most pickups have between 8000-10,000 windings so we need a way to keep track of that.
UPDATE: With the magnet mounted here when the machine is spinning at top speed the counter misses turns and gets stuck on one number. A better option is to put the magnet on the outside of the 5 inch disc that the pickup is attached to, that way the magnet has farther to travel for a rotation and the counter should be able to keep track of the number of windings at higher speeds.
Lastly I made a simple stand with a piece of scrap wood and a dowel rod to hold the lightbulb from the sewing machine. This creates a backlight on the pickup bobbin so that you can see the wire easier when winding the pickup. Plus the bulb was already there so why not put it to use!
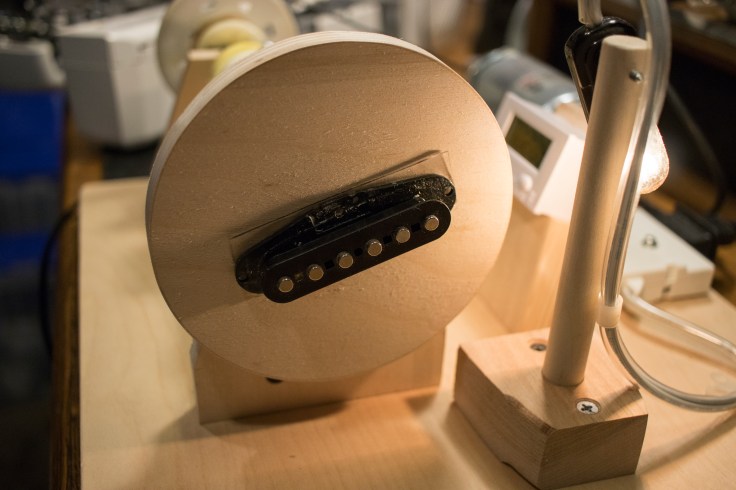
Then all there is to do is attach a pickup with some double sided tape and start winding!
You could also get some thin long screws and attach the pickup through the extra holes between the pole pieces on the pickup, Screwing it right into the wood disc.
For a better look at the process of making this machine check out the video here:
